The following is a detailed HOW TO post on making your own arrows from raw shafts. This article walks you through making an aluminum arrow. I’ll try to write another post in a couple weeks for carbon shafts as the process is a bit different.
This post is not intended to show the definitive method for arrow making but it shows my method which is tried and true. I have never had a problem with fletchings coming off or inserts falling out. I know a lot of guys that pay shops a good premium to have their arrows made only to have their fletchings and inserts fall off during practice. I am a perfectionist when it comes to my arrows and equipment and making my own allows me to tinker with various options and gives me a truly custom arrow.
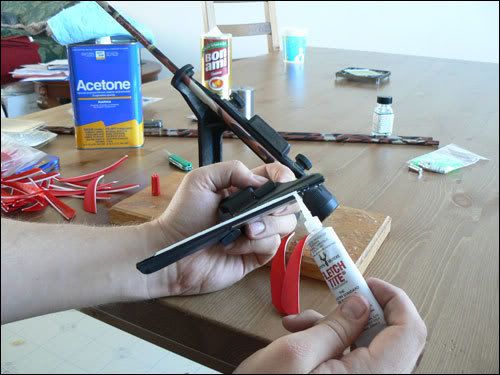
Materials
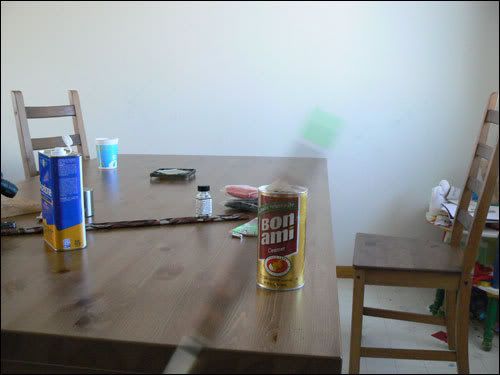
The first photo illustrates the various tools and materials needed for arrow making. (Kids Care-Bear cup in background not needed)
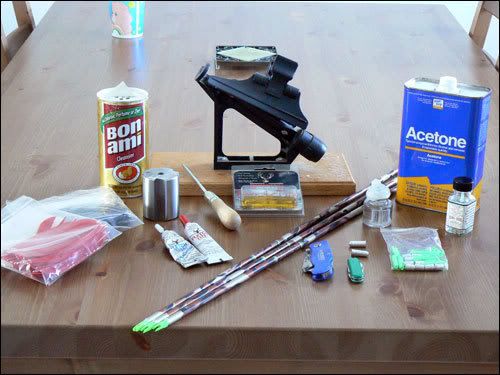
- Fletching Jig
- Acetone
- Bon Ami Cleaner
- Fletch Tite adhesive
- Fletchings
- Arrow Shafts
- Inserts
- Utility Knife
- Ferr-L-TIte
- Hack Saw with fine-tooth metal blade
For my tutorial I am using Easton 2219 XX78 raw shafts. These shafts come with pre-installed nocks so I will not be demonstrating nock installation here, but you can basically copy the method below for inserts to install a nock. I stress that all serious bowhunters use a quality shaft/arrow. In my experience “you get what you pay for”.
Cutting Arrows
I begin by marking the desired length on my raw shaft with a sharpie. I have a special cutting jig that fits in my vise for cutting arrows to length. I use a very fine hack saw blade made for metal. I’ve heard of some people using pipe cutters to cut aluminum arrows. The problem with this is that the pipe cutter will put a small kink in the end of the arrow which I do not like. When you put your insert on it will not be perfectly flush. My method allows for a perfectly flush insert.
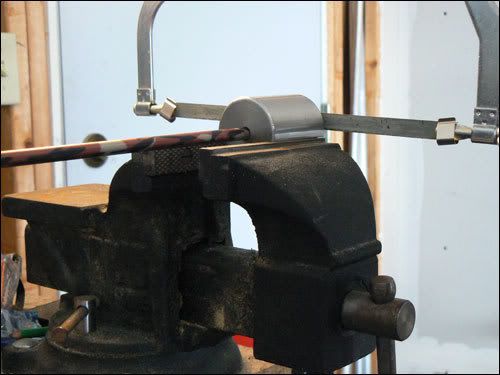
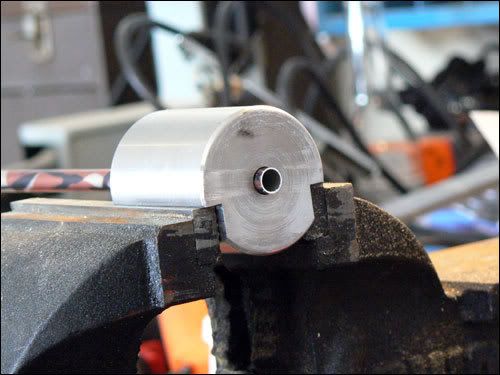
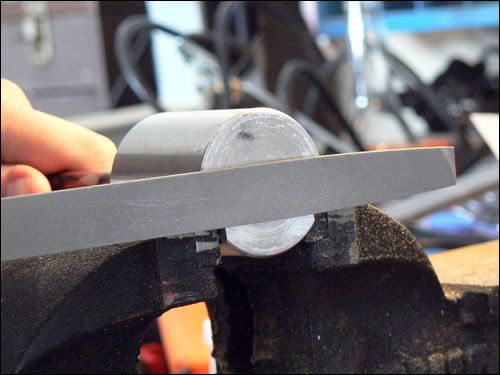
The end of the shaft is typically not perfect so I make it perfect using a fine file against the end of my jig.
Next you need to de-bur the inside of the shaft using a utility knife. This will prevent any splintering around your insert.
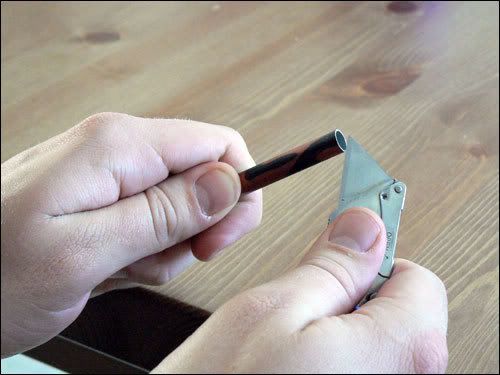
Now we are ready to install the insert. Note: You have to work fast here so make sure everything is ready at hand. Begin by heating the shaft over an open flame. I like to use a small alcohol burner as the burning temperature is low which is important as you do not want to overheat and damage anything. You can use a gas burner on a stove but be careful not to overheat. Avoid using candles as they leave a residue on the shaft and insert as they burn.
Once the shaft is hot (4-6 seconds) quickly stick the end on to a corner of your Ferr-L-Tite and rotate. The idea here is to get a thin coat of Ferr-L-Tite on the inside of the shaft. Next heat up your insert over the flame and quickly rub it in the Ferr-L-Tite coating all sides. Holding both the shaft and insert over the flame press the insert firmly into the shaft.
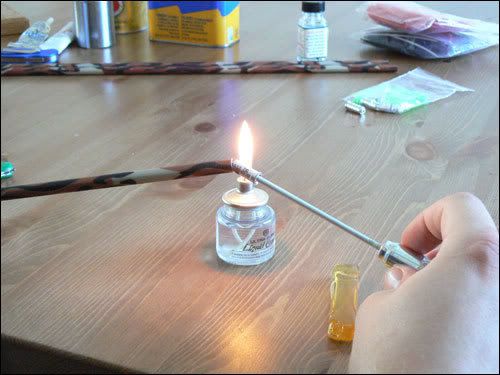
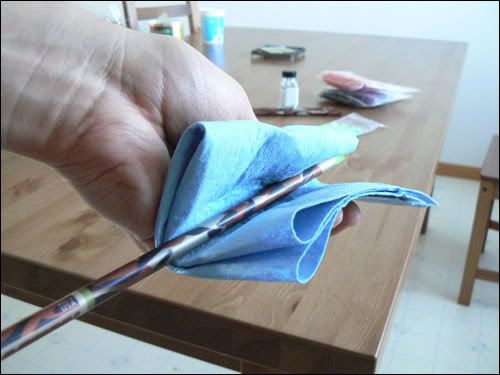
Excess Ferr-L-Tite will ooze out as you push the insert in. Simply wipe the excess off quickly with a shop cloth.
You have completed the insert installation. I have never had an insert come lose or fall out using the method above.
Shaft Preparation for Fletching
Begin preparing the shaft be cleaning the fletching area off with acetone. During manufacturing and shipping the shaft picks up unwanted chemicals and dirt. Acetone will remove chemicals. [b]Note[/b] Be sure to work in a ventilated area.
It is imperative that nothing comes into contact with the fletching area after this step. Oils from your fingers can cause adhesion problems later on. If the fletching area becomes contaminated at all repeat the cleaning process
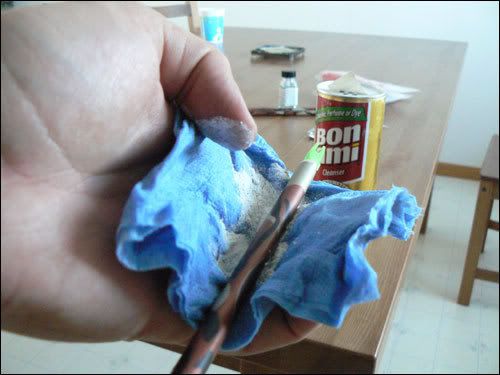
After using acetone we need to do a final preparation of the shaft. For this I use Bon-Ami cleaner. It is simply the best as it will not scratch the shaft but does a great job preparing the surface. Some guys use fine sandpaper but this leaves deposits and removes arrow material. Vigorously clean the area with Bon-Ami. After about a minute or two of cleaning rinse the shaft under your sink being careful not to touch the area.
Note: If the water beads on the fletching area then you did not clean enough with Bon-Ami. You want the water to “stick” to the area and not to bead.
To dry the shaft shake it back and forth until all of the water is absolutely gone. My kids love this part! (Don’t worry you won’t bend the shaft)
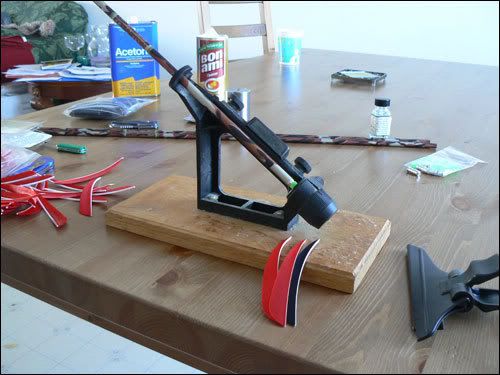
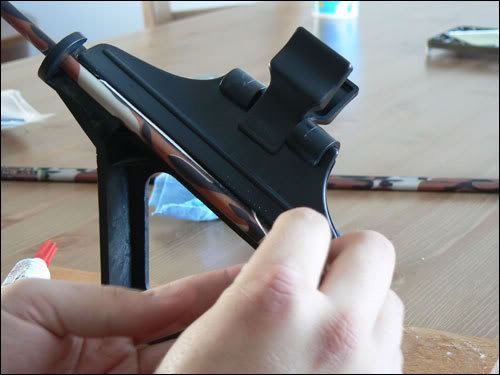
Once dry place the shaft into your fletching jig. (I like to put a heavy field point on the end of my shaft as the extra weight keeps it in place)
Fletching Your Arrow
I am fletching with feathers for this tutorial but the method is identical with vanes except for one step which I will point out. When using feathers make sure you select 3 that are the same length. They are typically very close but vary by a couple millimeters. It’s typical to have 2 feathers of the same color and 1 feather of a different color for the nock feather.
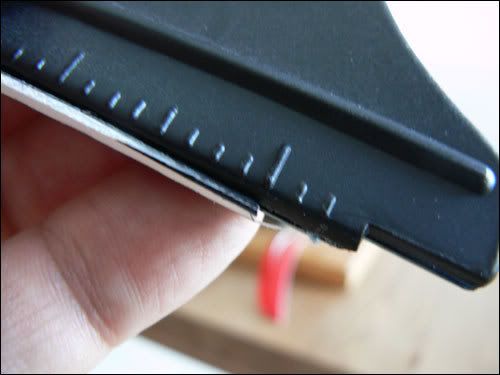
Always start the fletching process with your nock feather. Your fletching jig should have an indicator on the dial for the nock feather. Rotate the dial to the starting point. Next carefully slide your fletching into the magnetic holder. Note: Make sure not to touch the base of the fletching with your fingers. Again we want to avoid contaminating the fletching with oil from our fingers. Your fletching holder should have measure marks along the side of it. Make sure you align the fletching with the same mark each time. You can experiment with the measure points as you fletch your arrows.
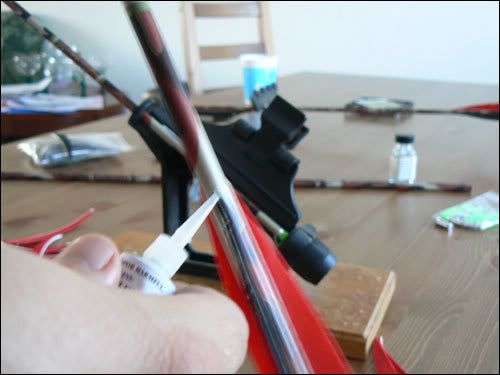
Note: Skip this step for Vanes!! Most people do not realize that almost all feathers actually come from real turkeys raised on farms! They are simply dyed and cut. Turkey feathers have some natural oils in them. For extra good adhesion I like to run a little acetone across the feather base. This step should be avoided with Vanes as some vanes are coated with chemicals to aid in bonding.
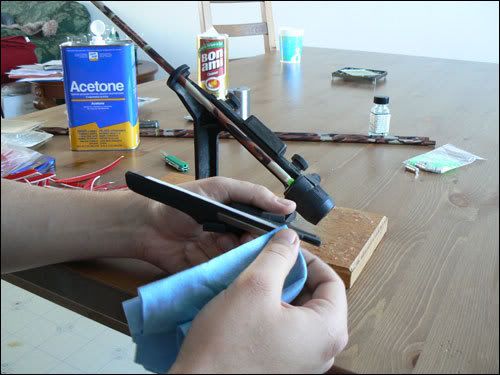
Run a small bead of Fletch-Tite along the base of the fletching. I use original Fletch-Tite for feathers and Fletch-Tite platinum for vanes. I’ve never had any luck with the instant glues out there. Recently I’ve heard of some people using gorilla glue but I have not tried it myself.
Gently set your fletch holder onto the jig. Make sure you align it the same for each fletching to ensure a consistent feather. Don’t worry about the small beads of Fletch-Tite that ooze out the sides; they will dry flatter than you think and you can always trim them with a razor blade once dry. Wait 3-5 minutes and run the backside of a thin knife blade along the fletch to help it contact the arrow.
Allow the fletching to dry. In my experience 30 minutes is the shortest I can wait for a good bond.
Repeat the process for the 2 remaining sides
Finally I like to put a tiny dab of Fletch-Tite at the tip of each fletching. This is a point of stress when your arrow passes through a target and it will help in keeping the fletching from peeling off.
And that’s it! You should now have a custom made arrow that won’t lose fletchings or inserts. For feathers I like to coat them with some of the water proofing products on the market. It helps a bit on those rainy days in the stand.
Making your own arrows is an enjoyable hobby that allows you to experiment with various fletchings and setups.